either this got lost, or it wasn't very interesting for other members to respond to. however, i'm re-posting it because I want to be in better shape for the may camp over here in europe so i can refine the moves and get the most out of it rather than learn them. i've been trying to get this since the last camp without success. i have no access to pmts instructors in austria before the may camp so any help would be much valued.
what consitutes a break down in the SP? i have worked very hard on this the past few weeks to no avail. When i do it as a drill, it works like this: both skis on uphill edges. tip the uphill foot more to uphill edge to complete the turn. balance on uphill edge of uphill ski while releasing the stance ski. remain flexed with the uphill leg, don't stand up. tip the downhill ski, counter as this occurs. keep tipping the free foot. the radius of my turns is huge, despite aggressive free foot tipping and flexing of the free foot leg and free foot pull back to pressure the tips. trying to integrate it into free skiing, i use a two ski length traverse on the bte as advised. i have too much speed across the slope, the uphill ski does not hook up, and the new turn takes a long time to complete.
in a free skiing situation, the uphill ski tips to the big toe edge before the downhill ski has tipped to the LTE - the inside ski is flat while the stance ski is already on its BTE. sometimes before release, the to-be-free foot (old stance leg) moves downhill before releasing. sometimes the uphill foot slides uphill.
what can i do to fix this now?
btw, i have had harb alignment work done.
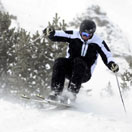
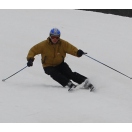
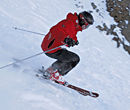
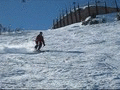
there is some footage at http://www.putfile.com/johnheath
it was after seeing this that heyoka advised phantom move work. although i have since lifted the free foot less and also looked to lighten it, and recently focussed on a two legged flex to make sure i don't stand up on the uphill ski at transition, the end result of a stem is essentially the same, if not as noticeable. unfortunately i have no recent footage as this was a one-off opportunity to ski with someone who gets pmts. unless Harald can hook me up with his dad, there is no chance over here of skiing with someone who knows pmts. the only success i have had at maintaining parallel skis and carving is with the tip-lead step technique, with more weight on the inside ski. (popularly taught in austria). like this i can get some lean, but it seems totally inapplicable on anything but a wide, flat and even slope. if there are a lot of people or the slope has been bumped up, i find even my poor effort at a SP more effective. the step method also automatically makes you get wider in the stance, so i don't see how i can use it in bumps or powder, once i get that far. it has to be the SP for me, but how come i can stay parallel with one technique and not the other?
really need assistance with the SP move
15 posts
• Page 1 of 1
really need assistance with the SP move
![]() by john heath » Mon Feb 13, 2006 9:18 am
by john heath » Mon Feb 13, 2006 9:18 am
- john heath
- Posts: 77
- Joined: Tue Oct 25, 2005 5:44 am
- Location: austria
![]() by john heath » Mon Feb 13, 2006 10:36 am
by john heath » Mon Feb 13, 2006 10:36 am
max, thanks for your reply.
sounds like you are interested in an alignment issue, so here's the full story.
on the downhill ski traverse free foot tipping i seem to drift, though not always. on the uphill foot traverse i can carve a nice thin line on the left foot, on the right foot it drifts a line about the width of a ski. the right knee always wants to pull down the slope and no ankle tipping will overpower it. i have canting material and have added some to the original alignment work after discussing the right leg with chris brown of hss. with that extra shim taped under the boot heel, sometimes in a straight run on the right foot only i even veer to the right now, but it depends how loose my sacro illiac joint is on a given day!
with most free foot tipping i'd say i find it difficult to tip far enough to tighten a turn or match the stance leg angle. even at full flex. this was the case at the camp - flex and tip more. since then i've developed flex but can't tip as much as i'd have to to tighten the turn even when i am very, very aggressive with this tipping and countering.
- john heath
- Posts: 77
- Joined: Tue Oct 25, 2005 5:44 am
- Location: austria
Re: really need assistance with the SP move
![]() by violao » Mon Feb 13, 2006 10:38 am
by violao » Mon Feb 13, 2006 10:38 am
john heath wrote:there is some footage at http://www.putfile.com/johnheath?
John, I think you should do some deshaking and de-interlacing prior to posting this video, otherwise it's hard to see anything. Try some bob-deinterlacer (individual fields to frames) - that way your clip will already play in slow-motion. If you don't know what I'm talking about you can post the clip somewhere for me to download and I can do that for you.
- violao
- Posts: 89
- Joined: Tue Dec 20, 2005 6:08 am
- Location: Croatia
![]() by Tommi » Mon Feb 13, 2006 10:39 am
by Tommi » Mon Feb 13, 2006 10:39 am
Ok,
1st: What skis do you have, type, length?
2nd: You have many elements of your skiing looking good, but you skid a lot. How you initiate the skid, is not very clearly visible on the video.
What I suggest to you:
1) If you do not have short, very small radius (aprx 11-12) medium flex skis, get/loan a pair
2) Ski on very flat terrain, green terrain, so that you get speed, but don't have to think about speed control too much
3) Take your time in release and do not jump on the new stance ski, it makes it skid. Just stand on it and tip and WAIT. It will turn..
4) Let the speed build in. Its impossible at first to initiate carve at slow speeds, it takes very precise coordination and tons of C/B. Its difficult. Use moderate speed, and remember not to turn the skis.
5) Look at your tracks. You'll see the problem from the tracks, you'll see your stance ski track to feather almost immediately at engage. This is your key point, where you have to get your hips in with free foot tipping to turn.
6) The best way of getting the feel for carving is to start from a traverse. Fix your body posture so that you have the skis tipped, have the c/b and c/a, everything set up. Step to falline, keep position with poles. Then just let go and do nothing..wait. You should draw two nice lines in the snow. Make this in both directions. Make it also on a steeper slope. Lighten the free foot. You'll feel the carve, and you'll feel the force building in.
My daughter 'got it' with these drills..
Skis are VERY important. If skis are too stiff or too long radius, it'll be very hard.
Good luck!
T2
PS see us (me and the kid) kiteski!
http://www.tupusurf.net/pdf/Leijakuvia_ ... Tuusis.pdf
-
Tommi - Posts: 296
- Joined: Wed Nov 24, 2004 3:38 am
- Location: Vantaa, Finland
![]() by john heath » Mon Feb 13, 2006 10:42 am
by john heath » Mon Feb 13, 2006 10:42 am
viola,
I'm technologically usefless i'm afraid, it took about a month to get the clips up at all. i found the slow motion images came out better - the original recording is at fault i think, very shaky due to the zoom we used. can you download from putfile or would you need the project file?
thanks a lot for your kind offer.
- john heath
- Posts: 77
- Joined: Tue Oct 25, 2005 5:44 am
- Location: austria
![]() by violao » Mon Feb 13, 2006 10:49 am
by violao » Mon Feb 13, 2006 10:49 am
I can't download from putfile. For deinterlacing I would need original resolution (720x576, 640x480, whatever you captured) otherwise deinterlacing won't work. Clips can be compressed though (like with divx, wmv, whatever). If you encode (compress) with original resolution what size are the clips (in MB)?
Last edited by violao on Mon Feb 13, 2006 10:51 am, edited 1 time in total.
- violao
- Posts: 89
- Joined: Tue Dec 20, 2005 6:08 am
- Location: Croatia
![]() by SLAVA » Mon Feb 13, 2006 10:51 am
by SLAVA » Mon Feb 13, 2006 10:51 am
H John,
I apologized for not seeing your post at first place.
I watch both of your videos.
The SP is advanced set of movements. You will learn it faster and gain more understanding by breaking it in very small steps (single movements) and learn to do them.
I analyzed your video and I think it would be beneficial for you to break turn into 2 stages and learn them one after another one.
First I recommend starting from bottom of the turn because it?s easer to learn. Then top of the turn.
I?m going to describe 2 deferent progressions know as ?fan progression? or garland progression? feel free to experiment with both and use either one.
Choose terrain you are very comfortable with.
Learning bottom of the turn:
In static across the hill.
Both feet on ?uphill edges?(downhill ski on BTE and uphill ski on LTE)
Keep you weight on downhill foot.
Tip your uphill foot to LTE where you actually can see that BTE of this foot separates from the snow further up.
Several time in both directions
Next step I recommend side slip.
Starting positions the same .
EX/2.flaten your skis at same time flex down hill foot it will shift most of you weight to uphill foot. You should start side slipping keep most your weight on uphill foot, both boots even from toe to the hill, look down hill.
stop side slipping by bringing your skis back to uphill edges.
When you roll your skis to up hill edges shift your weight back to the down hill foot at same time emphasize tipping action of your uphill foot to LTE.
Do it in both directions several times.
In traverse.
Start moving in traverse. flatten your skis just like in EX/2. as soon as your skis start moving toward fall line bring them back to the uphill edges really emphasizing tipping of uphill foot to the LTE you will come to the full stop.
Next time point you skis further toward fall line and perform same exercise.
Every time bring you skis further toward fall line until you facing fall line from static position. That will be end of fan progression for the bottom of the turn.
By doing this exercise:
1.you will gain confidence in finishing every turn with tipping auction of your uphill foot.
2.you will learn to complete you turns even if need it to the full stop thus gaining speed control
3.you will learn release.
Same exercise in garland progression.
Start moving in traverse in the passion described above. flatten your skis with movements described above. As soon as you skis start moving toward fall line bring them back the uphill edges shifting weight back to the downhill foot and emphasizing tipping action to LTE of uphill foot. DO NOT STOP as soon as you moving across the hill on your uphill edges flatten, this time bring them a little bit further down fall line.
Every time go further and further toward fall line.
Remember, small step at the time as a key
I will post next exercises later today or tomorrow morning.
Let me know of your progress
Best regards,
Slava
DOCENDO DISCIMUS.
-
SLAVA - Posts: 210
- Joined: Sun Feb 27, 2005 7:45 pm
- Location: Portland, OR
![]() by john heath » Mon Feb 13, 2006 11:03 am
by john heath » Mon Feb 13, 2006 11:03 am
slava, tommy,
thanks for your replies.
i think i was a little unclear. the videos are what happens in my normal skiing (that was in december. i'm better than that now, then i was trying to hinge the ski and that was making me lift it dramatically. but the errors are the same, if not as exaggerated). they were not videos of the drills. i spent several days over the last month just doing the drills (the whole day apart from busy sections) in the quietest and flattest places i could find, managing somehow not to get wiped out by other skiers. I can do a SP drill, i can do a SP turn waiting two ski lengths on gentle terrain, but i can't make it a short turn and i can't do it on steeper slopes where i will end up flying (and kill someone) if i traverse two ski lengths.
the traverse, garlands, side slipping drills are all part of my routines. i have been specifically working on the super phantom because the turn initiation was the big issue. if i can't release properly, there won't be any proper engagement later on. but i do do these drills too, as well as the the static tipping drills.
the skis i ski on are the head xrc 1100, 170, 15m radius. i tested them at the may camp and bought them after a lot of input from harald and rich messer. if i bought a new ski before the next euro camp i wouldn't get the alignment work done on it, although it does seem that harald has become very insistent about slalom length and radius skis.
thanks a lot for your detailed posts and sorry to have not been clear enough in the first place.
Last edited by john heath on Mon Feb 13, 2006 11:13 am, edited 1 time in total.
- john heath
- Posts: 77
- Joined: Tue Oct 25, 2005 5:44 am
- Location: austria
![]() by SLAVA » Mon Feb 13, 2006 11:25 am
by SLAVA » Mon Feb 13, 2006 11:25 am
but the errors are the same, if not as exaggerated
For that reason along i highly recommend try that i describe above in my previous post.
You will learn how to control your speed
You perform these exercises no problem on green try do 'em on blue
One more thing...
Perform this self check on blue terrain can you from static across the hill skiing on edges
release your skis to flat move toward fall line keep skis flat and parallel then gradually tip the new uphill foot to LTE make a full turn to complete stop with out any push of your down hill ski outside?
DOCENDO DISCIMUS.
-
SLAVA - Posts: 210
- Joined: Sun Feb 27, 2005 7:45 pm
- Location: Portland, OR
![]() by SLAVA » Mon Feb 13, 2006 11:39 am
by SLAVA » Mon Feb 13, 2006 11:39 am
have been specifically working on the super phantom because the turn initiation was the big issue.
so did you worrk out the fan progression for the top of the turn?
what's the progress?
DOCENDO DISCIMUS.
-
SLAVA - Posts: 210
- Joined: Sun Feb 27, 2005 7:45 pm
- Location: Portland, OR
![]() by Tommi » Mon Feb 13, 2006 11:53 am
by Tommi » Mon Feb 13, 2006 11:53 am
You'll be surprised how much more feedback and autopilot feel the small radius ski will give you. Try to find a suitable short ski at least as a rental one time. SL9 is good in 160/165, supershape is quite easy even at 170cm, shorter ones I have not tried, but are probably even better for learning.
15m ski is fine after you've got the technique right.
It's again a question of speed vs. radius. The short radius ski will give lots of rebound and feel even with moderate speeds.
This is very important, i've tried to learn carving with 20m radius titanium Atomics, I know! It can be done, but not easily below 40-50 km/h! Luckily at that time I bought a used pair of Salomon Equipe SL at 160cm, and voila', it was so much easier!
Good luck,
T2
-
Tommi - Posts: 296
- Joined: Wed Nov 24, 2004 3:38 am
- Location: Vantaa, Finland
![]() by milesb » Mon Feb 13, 2006 12:54 pm
by milesb » Mon Feb 13, 2006 12:54 pm
The key thing that SLAVA is saying is that you need to go to much gentler terrain. The steepness causes you to put your weight back. This leads to twisting the skis around to get the turns started. It also leads to you bringing the skis across the fall line to control speed, which is good but it makes it harder to start the turn properly. Find a slope to practice where you are comfortable keeping the skis more in the fall line. Then all your efforts should pay off. And don't be discouraged by this, I only make perfect PMTS turns consistently on green and easier blue terrain.
YouTube channel https://www.youtube.com/channel/UCH78E6wIKnq3Fg0eUf2MFng
-
milesb - Posts: 981
- Joined: Sat Feb 21, 2004 10:17 am
- Location: Los Angeles
![]() by Olle » Tue Feb 14, 2006 2:23 am
by Olle » Tue Feb 14, 2006 2:23 am
Hi John,
I'm new to this forum but I'd like to offer a few words of advice based on my own struggle which was remarkably similar to yours.
After considerable effort, I discovered that the release/transfer/engage sequence worked only when I properly executed the release. No amount of effort in transfer or engagment will deliver the desired result without a proper release.
After some painful introspection I realized how frightened I was of actually releasing my skis. Rather than letting both skis go flat, I was holding a little edge and using it to throw my heals around the corner just as you demonstrate in your video.
I managed to conquer this perfectly natural (but counterproductive) tendancy by practicing rolling my skis in unison to flat and then to the opposite edges. I did this on the flattest traverses I could find to completely eliminate the imperative to turn (twist, rotate, etc) my skis. Any degree of slope that makes turning or speed control necessary is too steep because it reinforces the natural tendancy to turn your skis rather than letting them turn you.
Once you can tip to an edge, roll to a flat ski and tip to a new edge without any direction change whatsoever, you are ready for the the R/T/E primary movement sequence.
Bring this exercise into your free skiing by focusing on the idea of committing to your release by rolling your skis to flat before any other action.
Good luck!
Olle
- Olle
- Posts: 3
- Joined: Tue Jan 17, 2006 2:39 pm
15 posts
• Page 1 of 1
Return to Primary Movements Teaching System
Who is online
Users browsing this forum: Bing [Bot], Google [Bot] and 59 guests